Easy to Draw Erupting Volcano How to Draw Erupting Volcano
The volcano is an opening on the Earth's crust through which lava, volcanic ash, and gases flow out of.
Though volcanoes may be dangerous in close proximity, it looks stunning in a far distance. Some of the most famous volcanoes are Mount Etna and Mount Fuji.
The extreme beauty of volcanoes as well as the fascination about this natural scenery has created a huge demand for a free volcano drawing tutorial.
So, we've created a step-by-step tutorial on how to draw a volcano, summed up in 9 quick and easy steps.
With this comprehensive tutorial, you can marvel at the wonder of a volcano up close and personal.
What's more, you can customize your volcano drawing as much as you like! You can even handpick the colors to create a unique volcano like no other!
Have fun and use your artistic skills!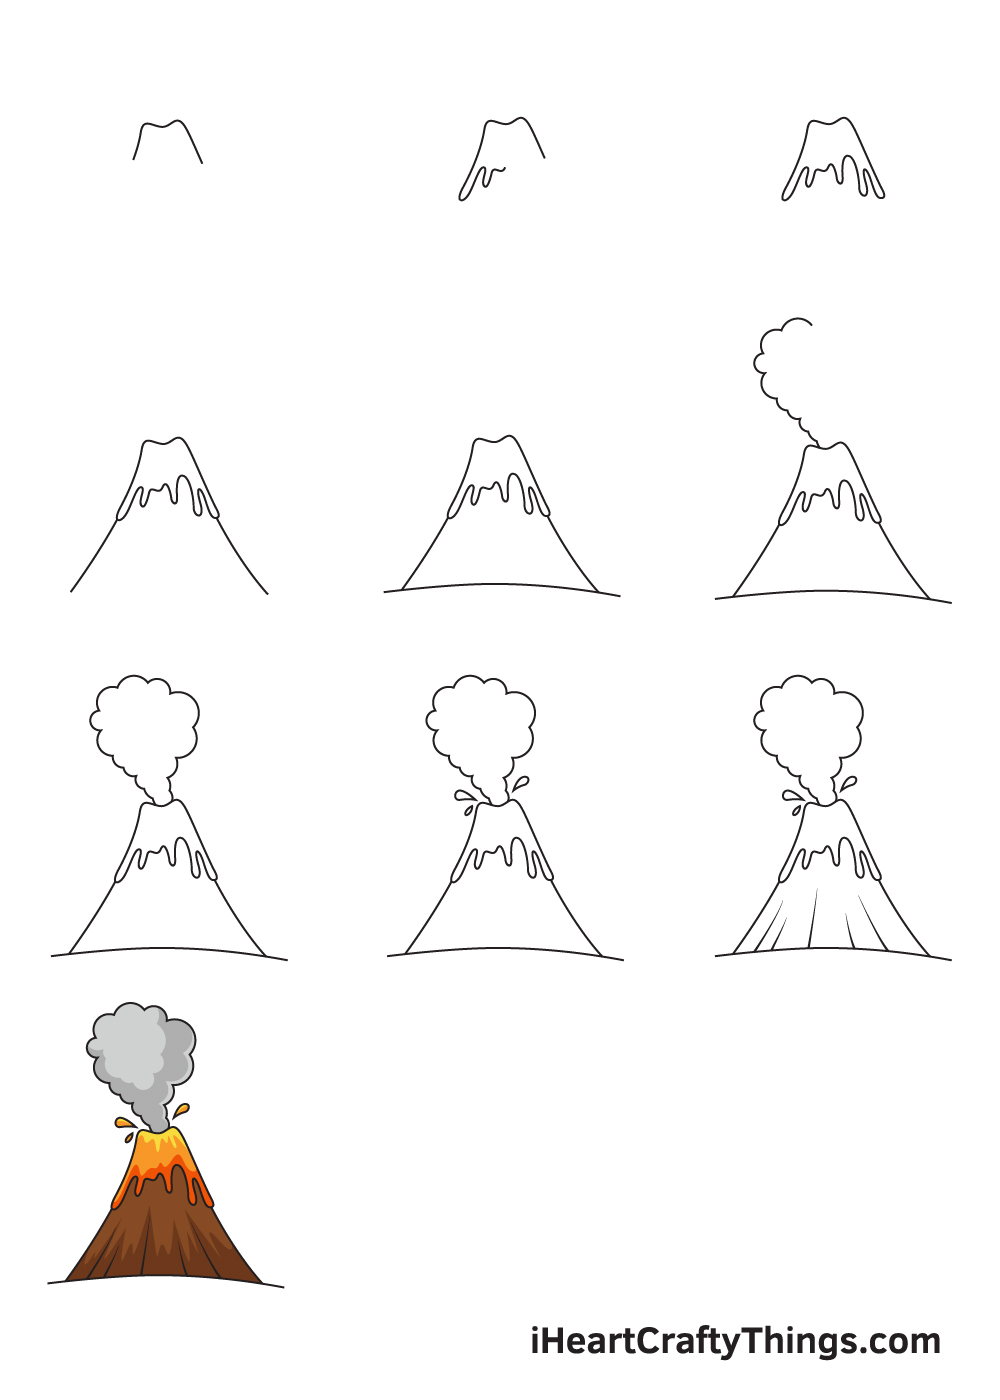
What's in this Blog Post
- How to Draw a Volcano – Let's get started!
- Step 1
- Step 2 – Draw the Crater of the Volcano at the Top
- Step 3 – Afterwards, Draw the Volcano's Lava Flow
- Step 4 – Now, Draw the Entire Structure of the Volcano
- Step 5 – Draw the Ground Underneath the Volcano
- Step 6 – Draw the Ash Cloud Coming Out of the Crater
- Step 7 – Finalize the Ash Cloud Out of the Volcano
- Step 8 – Next, Draw Some Droplets of Melted Lava
- Step 9 – Add Some Details on the Body of the Volcano
- Here's how you can make your volcano drawing even better…
- Your Volcano Drawing is Complete!
How to Draw a Volcano – Let's get started!
Step 1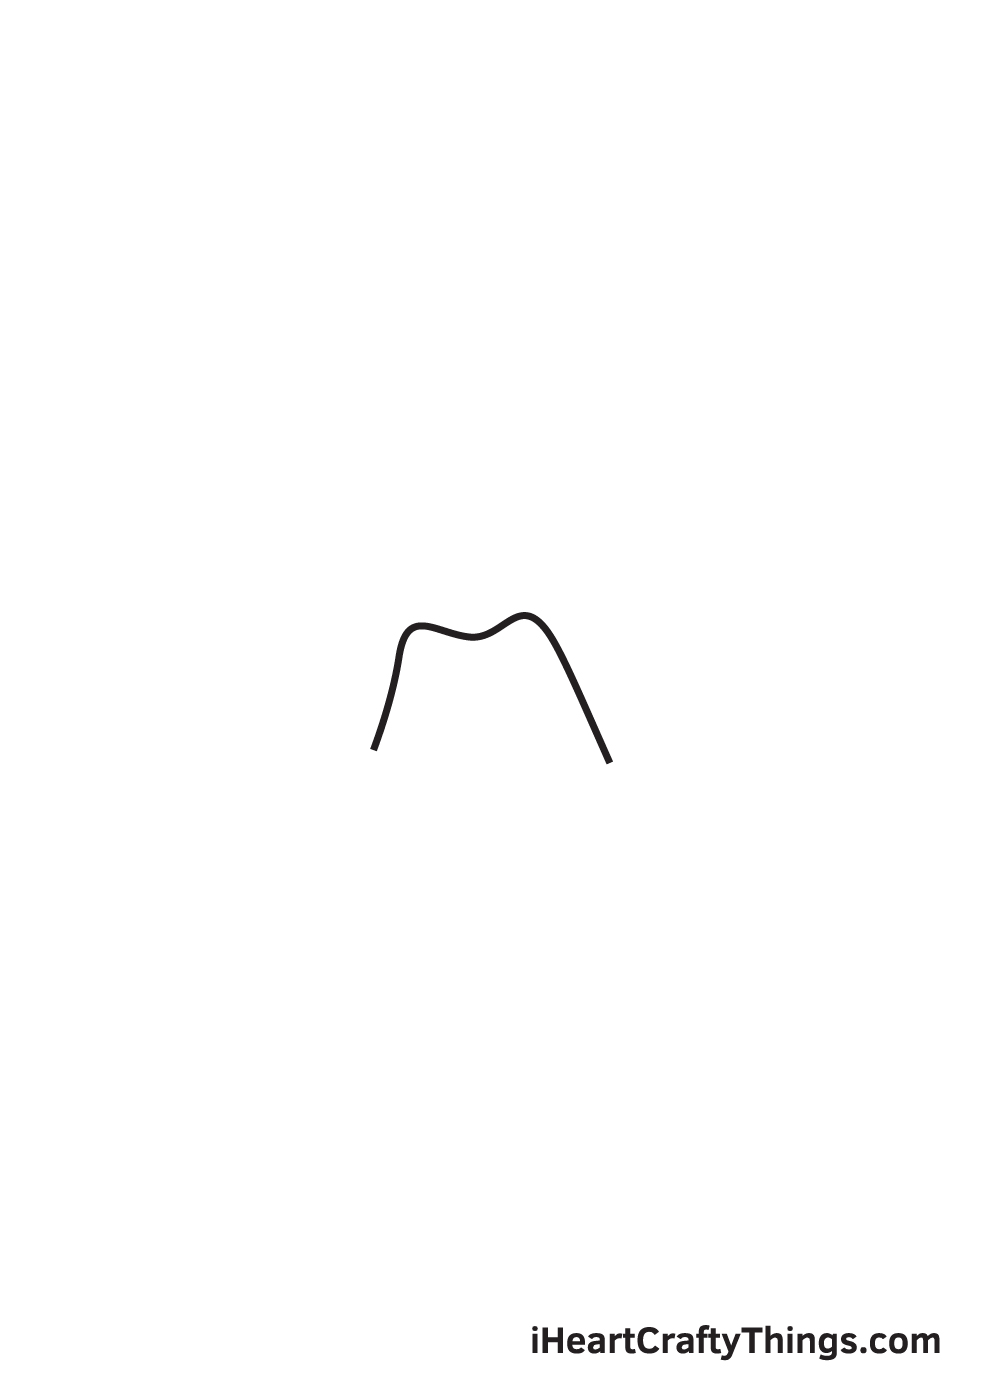
Start by drawing a line forming the crater of the volcano in the center of your paper. This creates the topmost part of the volcano.
Make sure that the crater will be drawn in the middle by creating reference lines. Simply draw an intersecting horizontal and vertical line across your paper and use it as guidelines.
The point where the two lines meet marks the spot where you should draw the crater.
Then, once you're done drawing the volcano, just remove the reference lines to keep your drawing neat and tidy.
Step 2 – Draw the Crater of the Volcano at the Top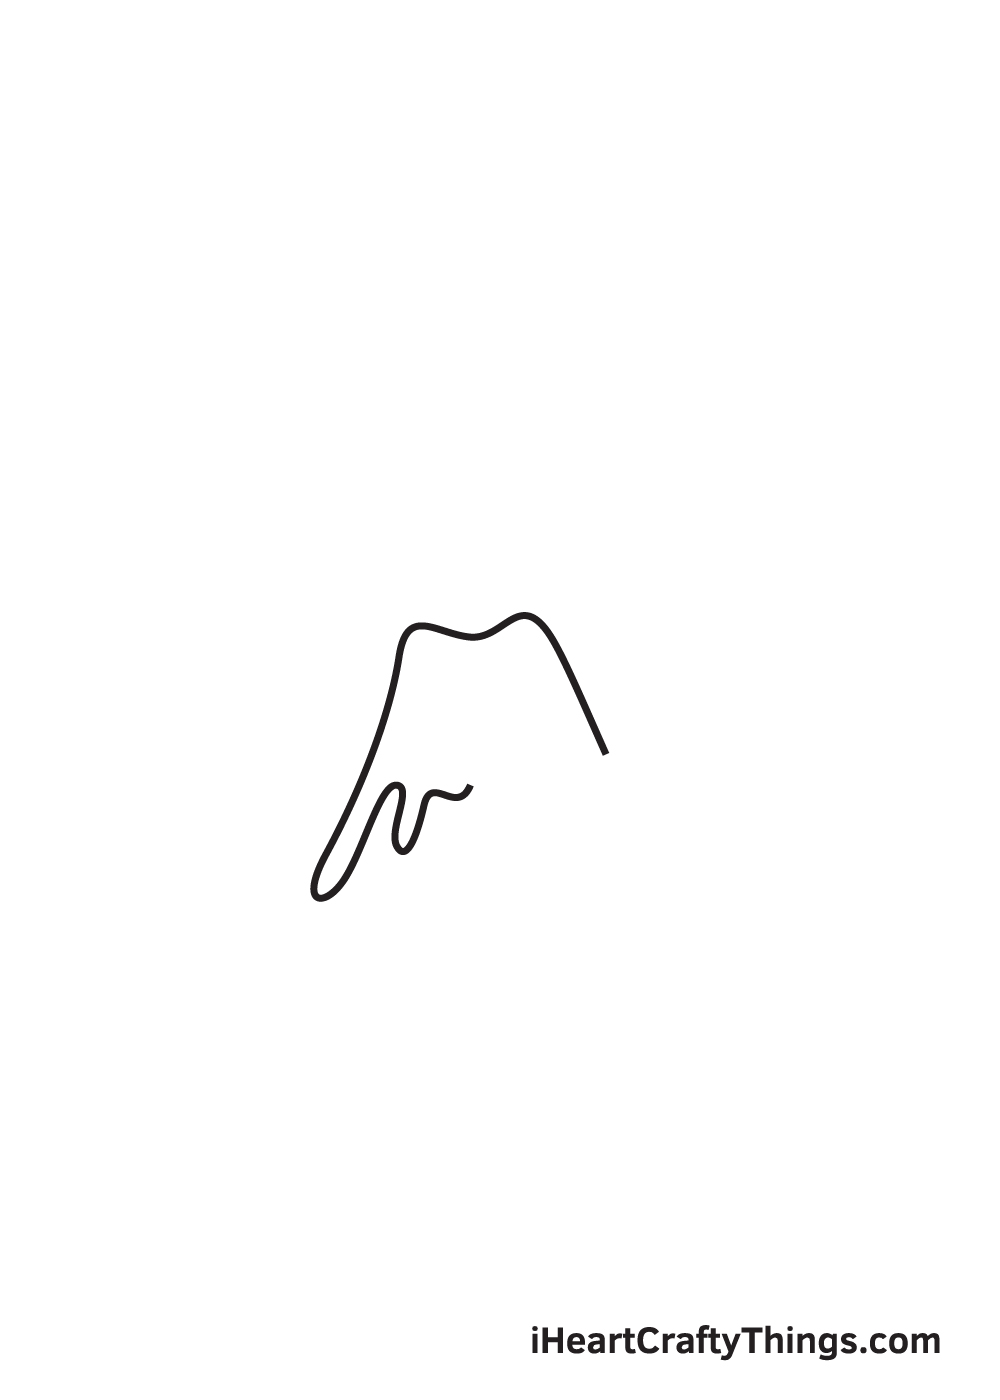
Extend the lines of the crater by drawing multiple elongated line figures with curved bottom in various sizes.
When drawn correctly, this should look like a drip effect. This creates the lava flow coming out of the volcano's crater or vent.
Step 3 – Afterwards, Draw the Volcano's Lava Flow
Repeat the previous step until the drip effect encompasses the entire bottom part of the crater.
This completes the lava flowing out of the crater of the volcano.
Step 4 – Now, Draw the Entire Structure of the Volcano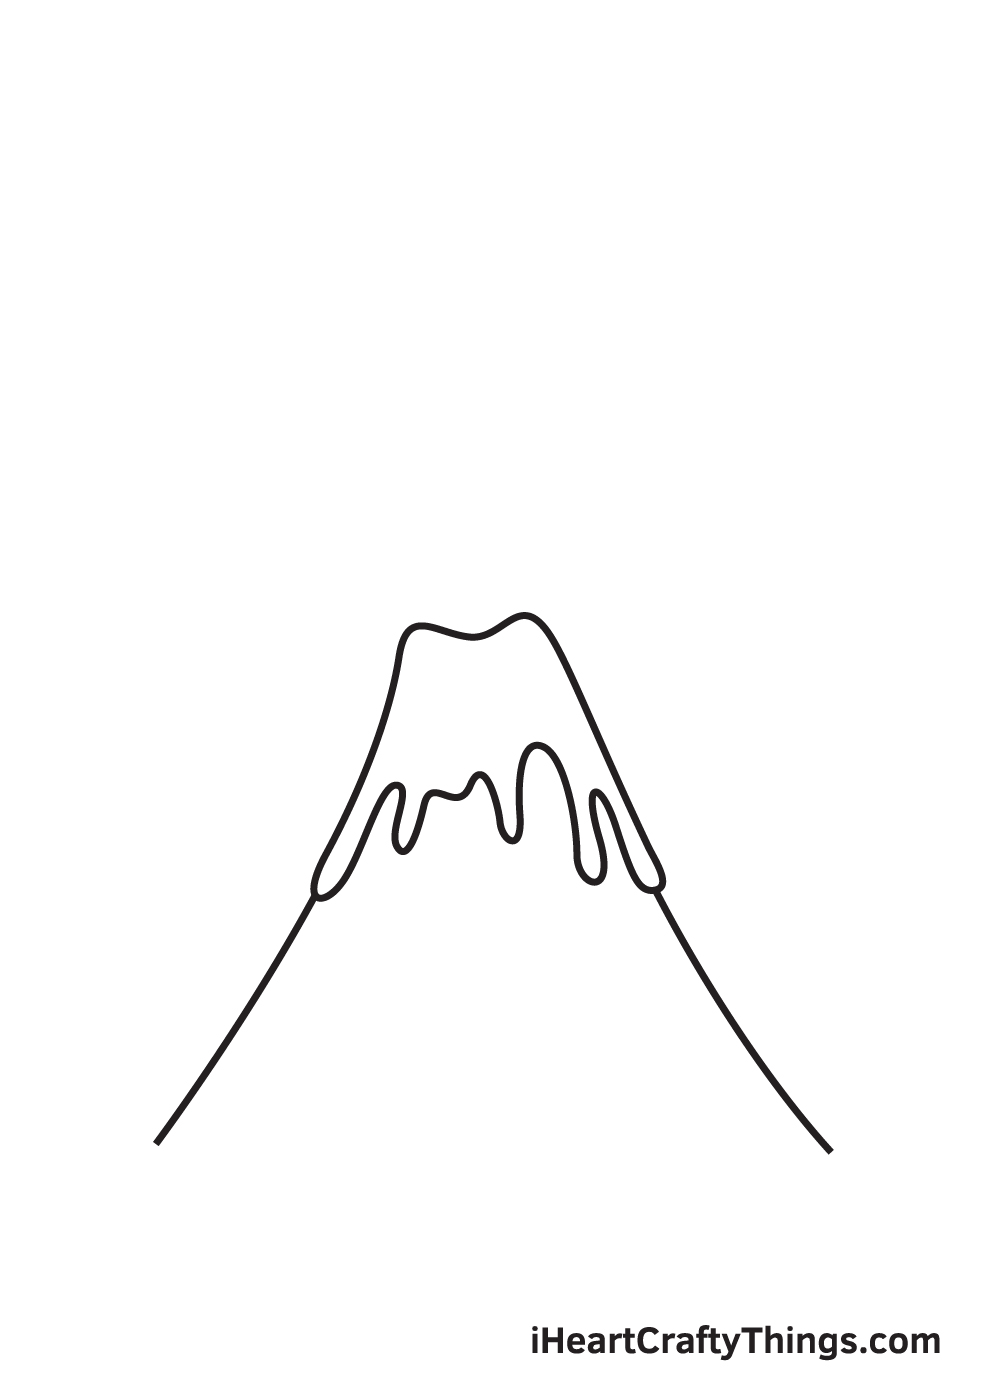
Draw a slightly curved diagonal line on each side underneath the lava flow. This forms the structure or the body of the volcano.
Keep in mind that both sides of the volcano must be aligned with the edges of the lava flow, as shown in the illustration above.
Step 5 – Draw the Ground Underneath the Volcano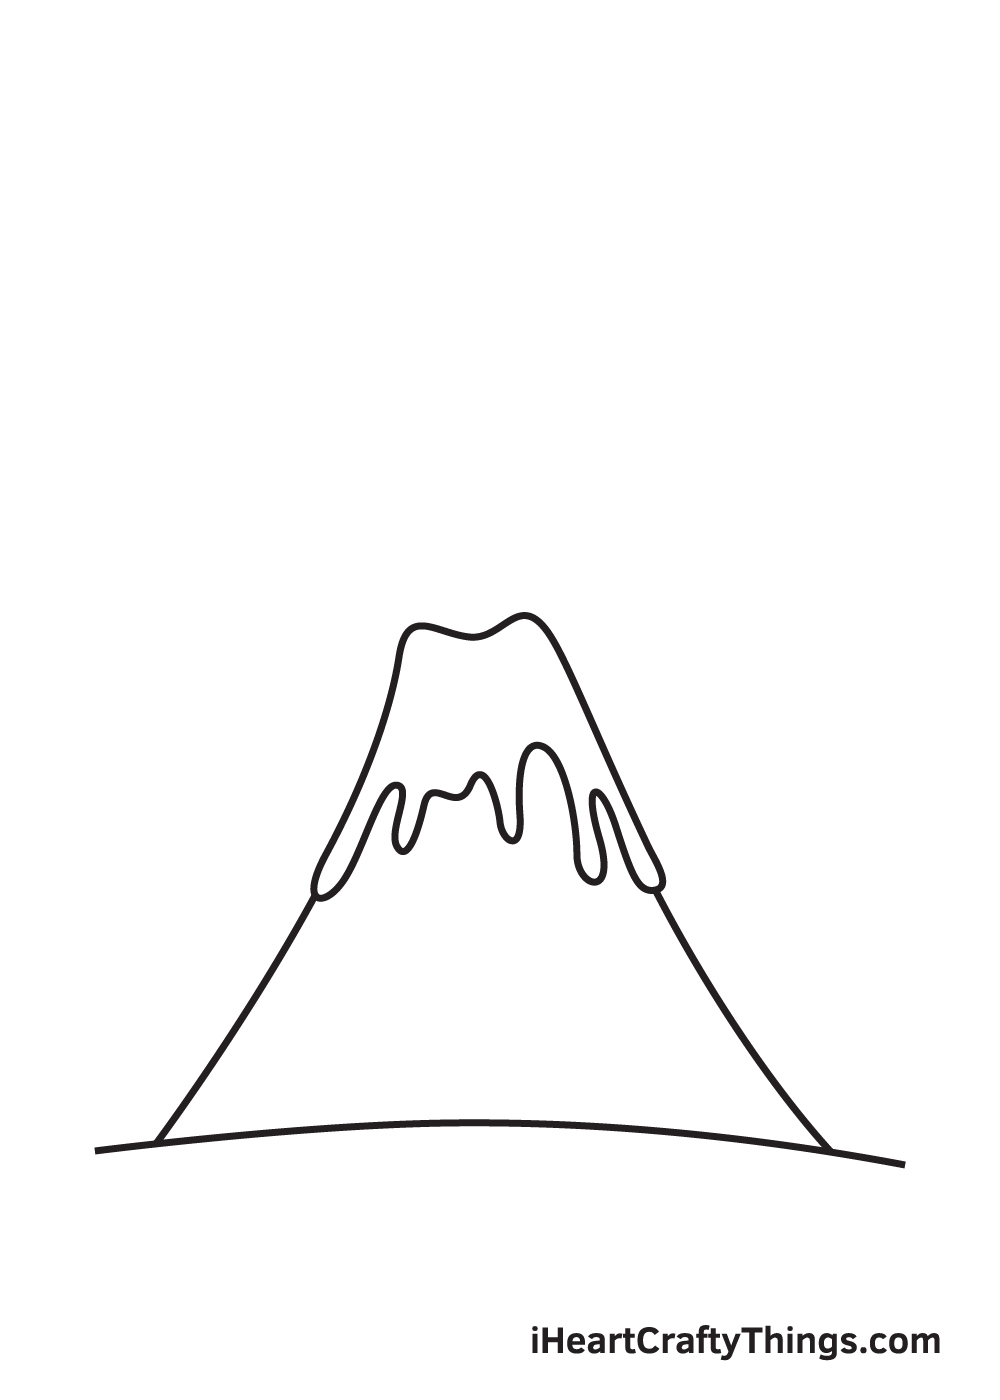
Draw a slightly curved horizontal line right underneath the volcano.
This creates the ground where the volcano is standing on.
Step 6 – Draw the Ash Cloud Coming Out of the Crater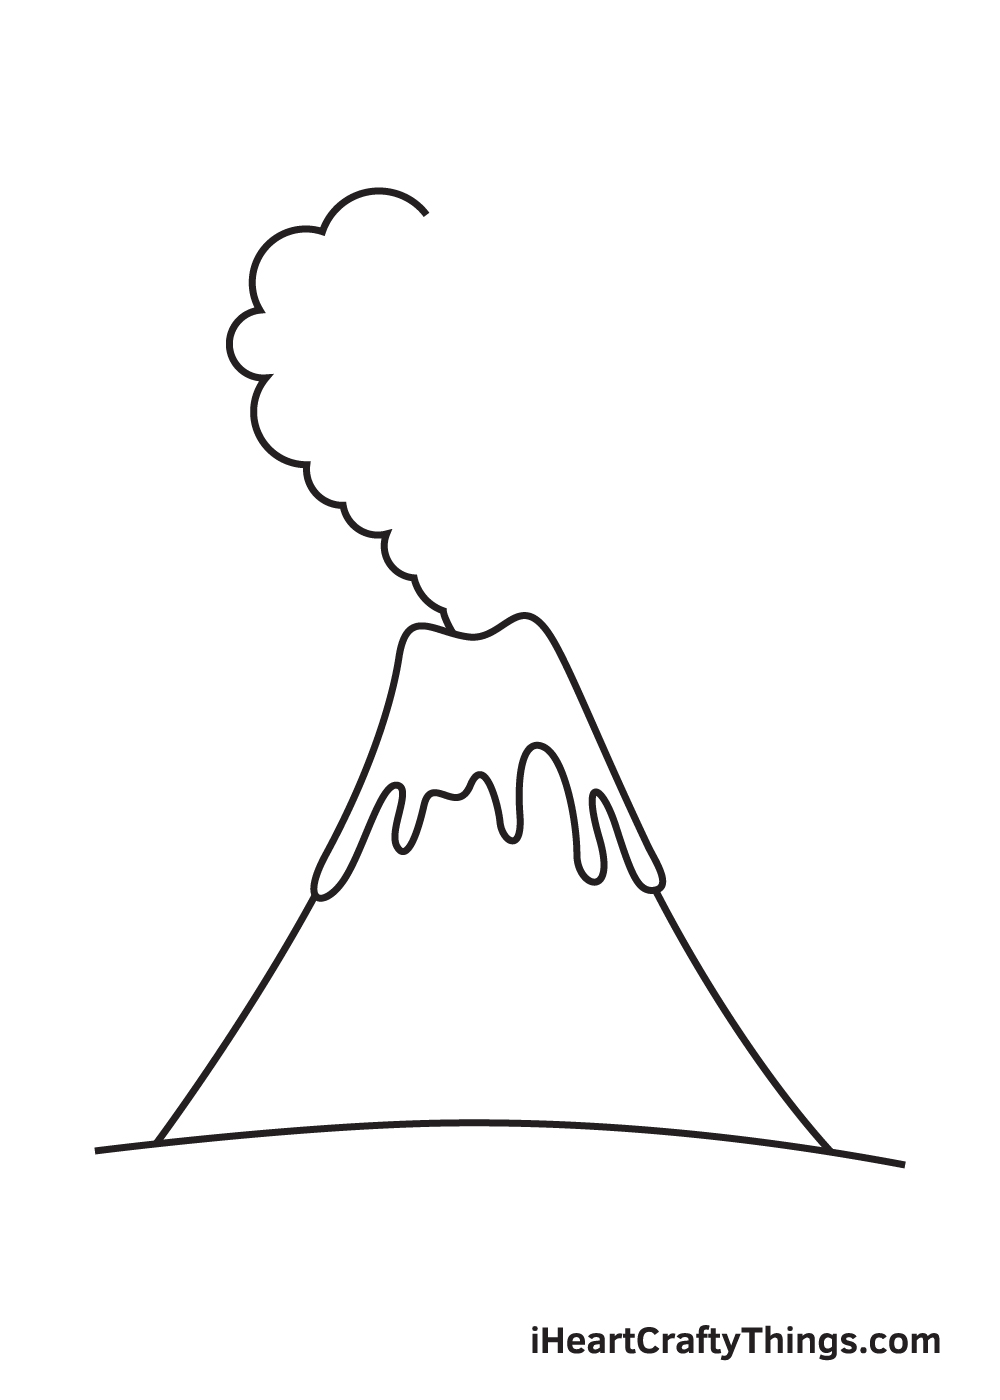
Draw a continuous scalloped line until it forms a cloud of ash halfway through.
Keep in mind that the ash cloud should be coming out of the crater and goes upwards into the skies.
Step 7 – Finalize the Ash Cloud Out of the Volcano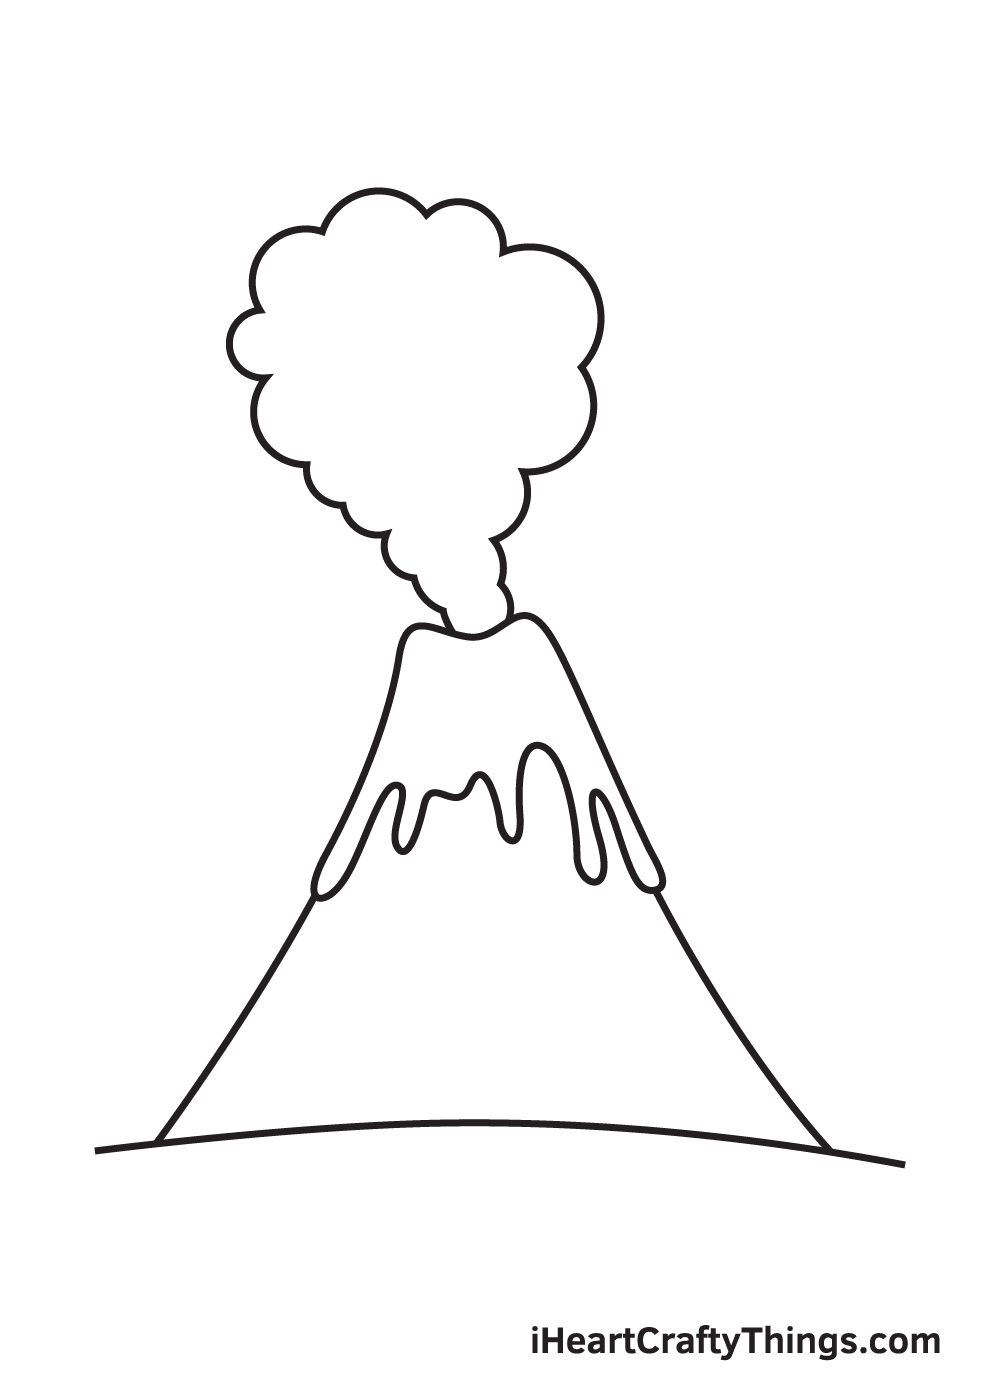
Repeat the previous step to complete the structure of the ash cloud. At this point, the ash cloud coming out of the volcano's crater should be fully formed.
When drawn correctly, it should look like a puff of cloud floating mid-air above the crater or the vent of the volcano.
Step 8 – Next, Draw Some Droplets of Melted Lava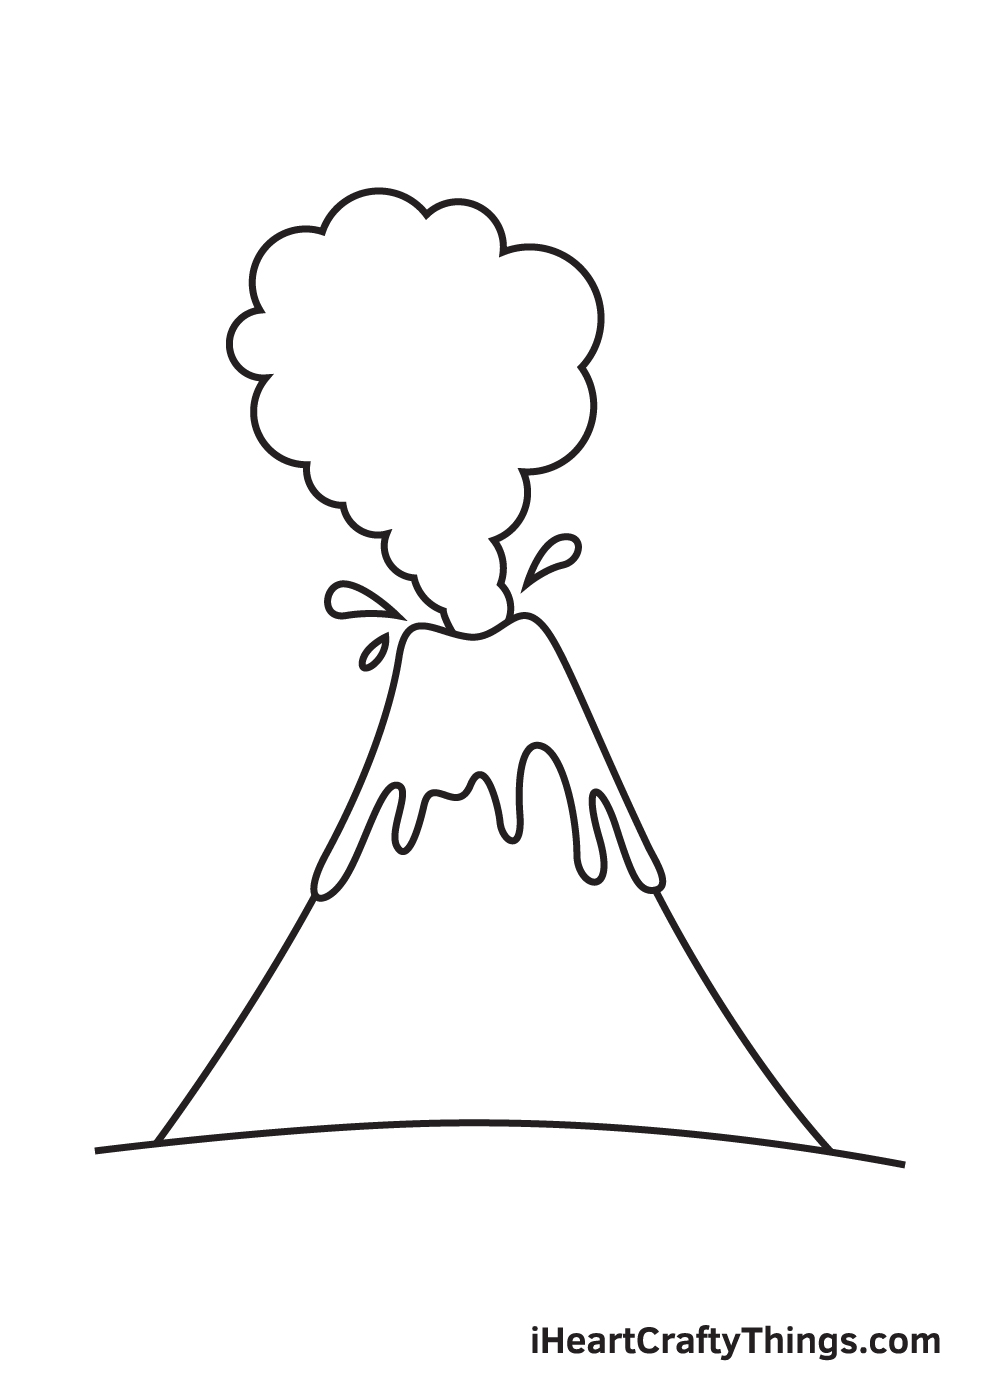
Draw multiple droplet figures in various sizes surrounding the crater of the volcano. This creates the illusion that hot, melted lava is splashing in different directions.
This also adds an artistic effect on your volcano drawing!
Step 9 – Add Some Details on the Body of the Volcano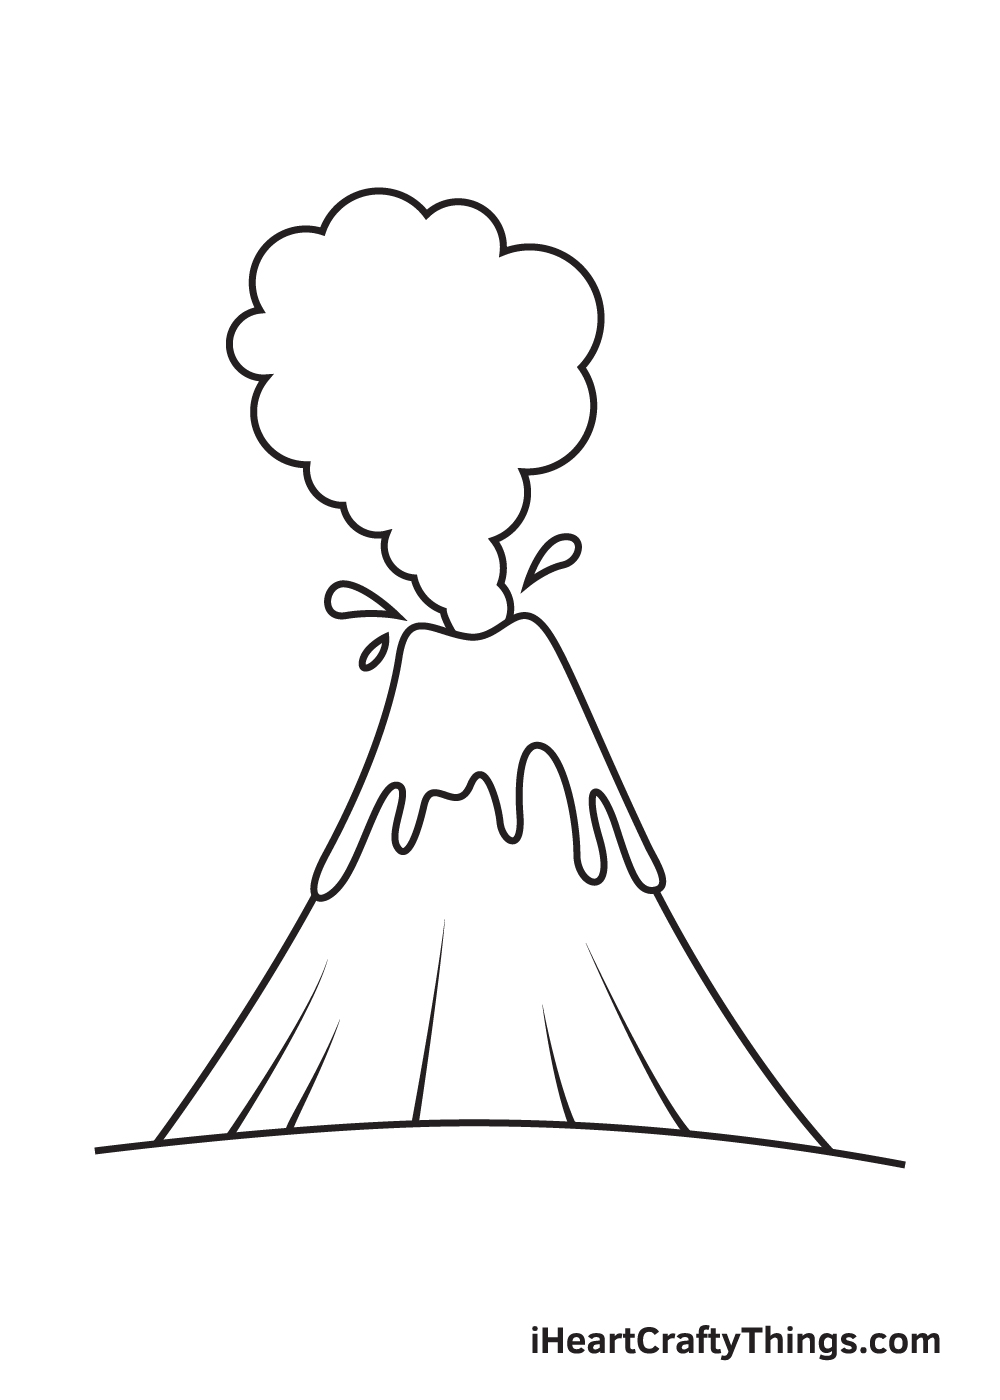
Volcanoes, and even mountains, don't have a perfect pointed cone shape. Most of them have ridges and bumps on the surface, so that's exactly what we'll be drawing in this step.
Draw multiple straight lines at the bottom of the volcano. This creates the ridges surrounding the base of the volcano.
This also adds texture on your volcano drawing, making it look ten times more realistic!
There you have it—we have successfully drawn a volcano! Now, it's finally time for the most exciting part, which is choosing the colors and coloring the volcano!
The color of a volcano is typically a mixture of brown and green, which is quite similar to the color of a soil or land. Its lava, on the other hand, ranges from vibrant orange to red depending on its temperature.
You can opt to color the volcano using its original colors or handpick a unique set of colors! Either way, we're sure the colors will turn out beautifully!
Have fun playing with colors and watch as the volcano ultimately comes to life!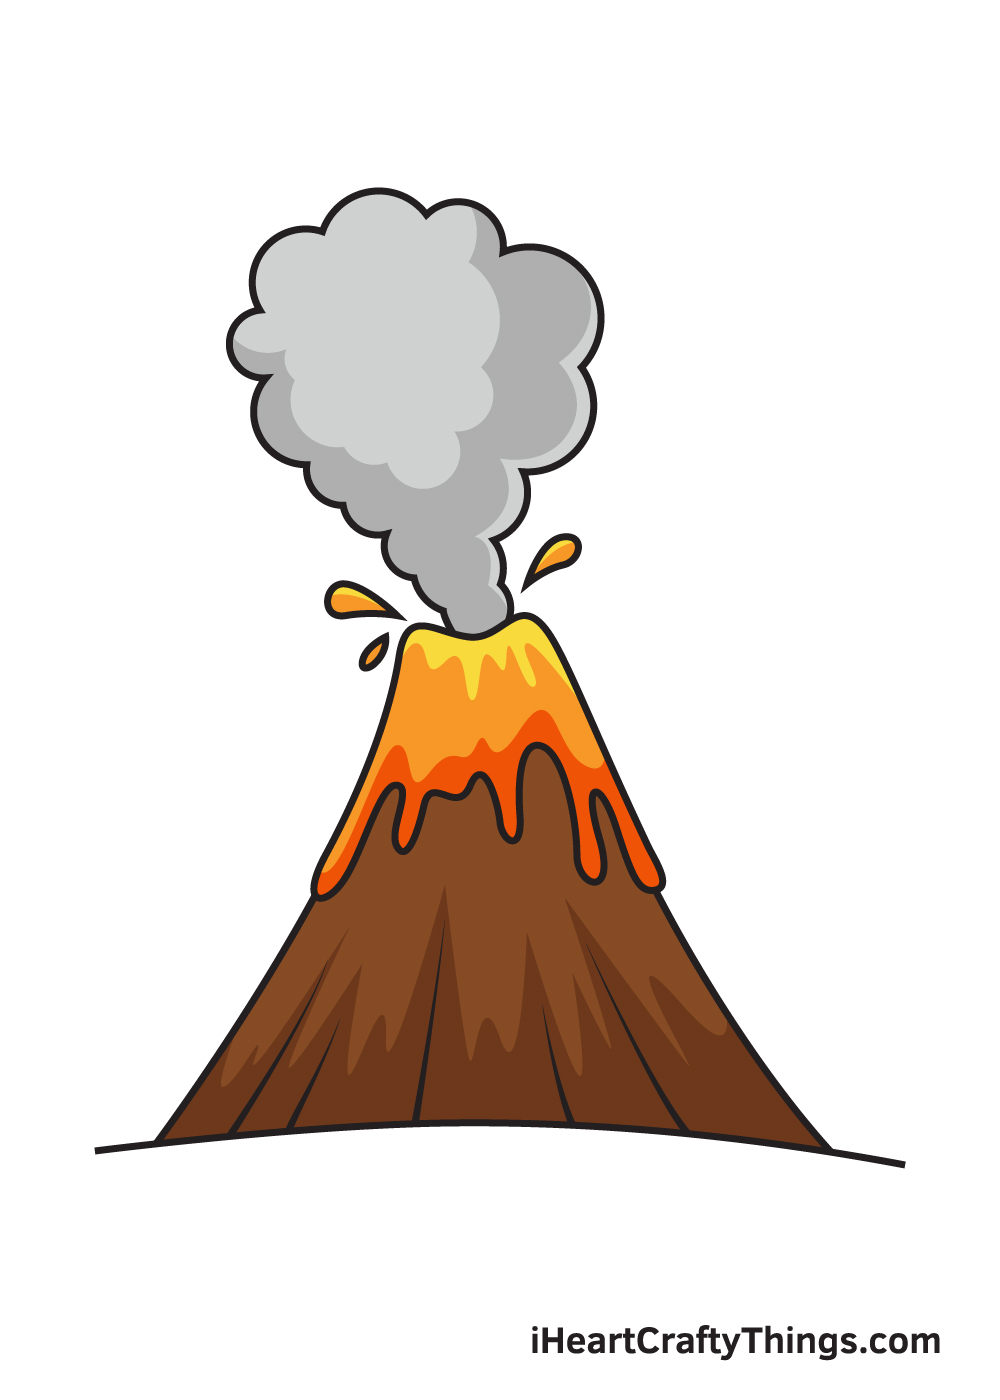
Here's how you can make your volcano drawing even better…
Let your creativity erupt as we make this drawing look even more incredible!
We kept the focus mostly on the volcano for this drawing, but now you can add to it by drawing some more of the background.
There are so many details that you could draw for this background, from mountains to an ocean.
These are just two of many ideas you could try out, but you could really create an interesting scene with what you add! What kinds of backgrounds do you think would best suit this image?
Once you have decided how you wish to handle the background, you can also just stick to some finer details. You can make this drawing of a volcano even more dynamic by adding these kinds of details.
They could be trees on the side or base, or you could even draw some people brave enough to hike up the volcano. These kinds of details can be small, but they can make a huge difference!
We love the design of this volcano sketch, but don't be shy about changing some of the structural details!
For example, you could make it much larger for a more impressive sight. Or, you could change it to look like it's about to erupt instead of already doing so.
Even though it's a cool design, you can still put your own spin on it to create your own interpretation. What details would you change about this volcano?
This tip is all about colors and art mediums. We spoke about a few colors you could use, but there is even more that you could do!
One way to make this volcano drawing look very interesting would be to glue some cotton wool over the smoke of the volcano.
That would make this picture have an element to it that you can feel with your fingertips to give it an extra element.
That is one way you could use crafts for this page, but can you think of others? Another idea would be to use thick orange paint for the flowing lava.
Your Volcano Drawing is Complete!
Hopefully, you had an enjoyable drawing activity with this step-by-step volcano drawing tutorial. If you had fun drawing a volcano, perhaps you will also be interested in drawing a waterfall or an ocean.
Check out our "How to Draw" catalog to explore drawing tutorials of many more beautiful natural sceneries!
Remember, all of our drawing tutorials are completely free for you to use as learning materials or references for your drawing activities.
We are regularly updating our catalog so make sure you keep re-visiting our website to continuously enjoy brand-new drawing tutorials! What would you like to draw next? Let us know and we'll do our best to create a drawing tutorial for it!
Successfully completing a volcano drawing is a great achievement, so you should feel proud of yourself for completing a masterpiece!
Don't forget to take a photo of your artwork and share it on our Facebook page and on Pinterest. Don't be embarrassed! You've worked hard for it, so we're sure it looks impressive!
We can't wait to see your realistic volcano drawing!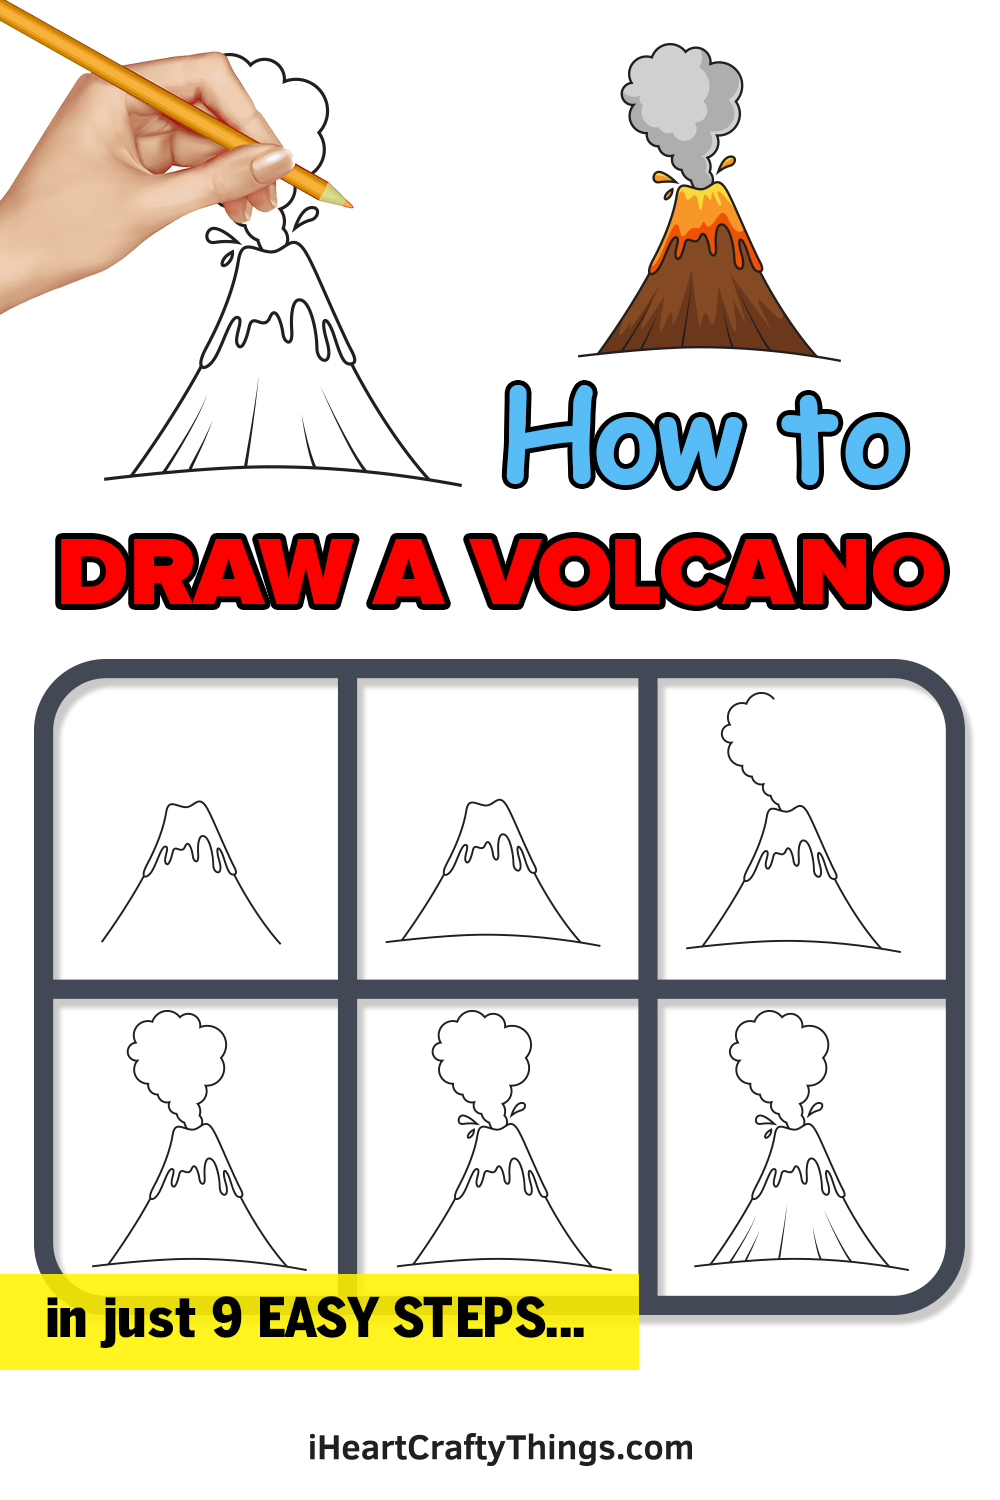
Source: https://iheartcraftythings.com/volcano-drawing.html
0 Response to "Easy to Draw Erupting Volcano How to Draw Erupting Volcano"
Post a Comment